I recently built a work bench in my garage and wanted to be able to have a computer there. The reason being is so that I can use AutoCAD and have the ability to look up parts, plans, calculator, stream music etc. I had an old dell computer laying around and decided to use it in the garage. I mounted the LCD to the work bench and placed the tower underneath. The problem was that it was taking up too much room. So I decided to build a custom case that is mounted under the workbench. Below are some of the picture of the build process.
Materials:
Dell computer case components.
Pine boards.
Motherboard standoff pins.
Glue and various screws.
Trunk latches.
5-120mm case fans.
Photos:

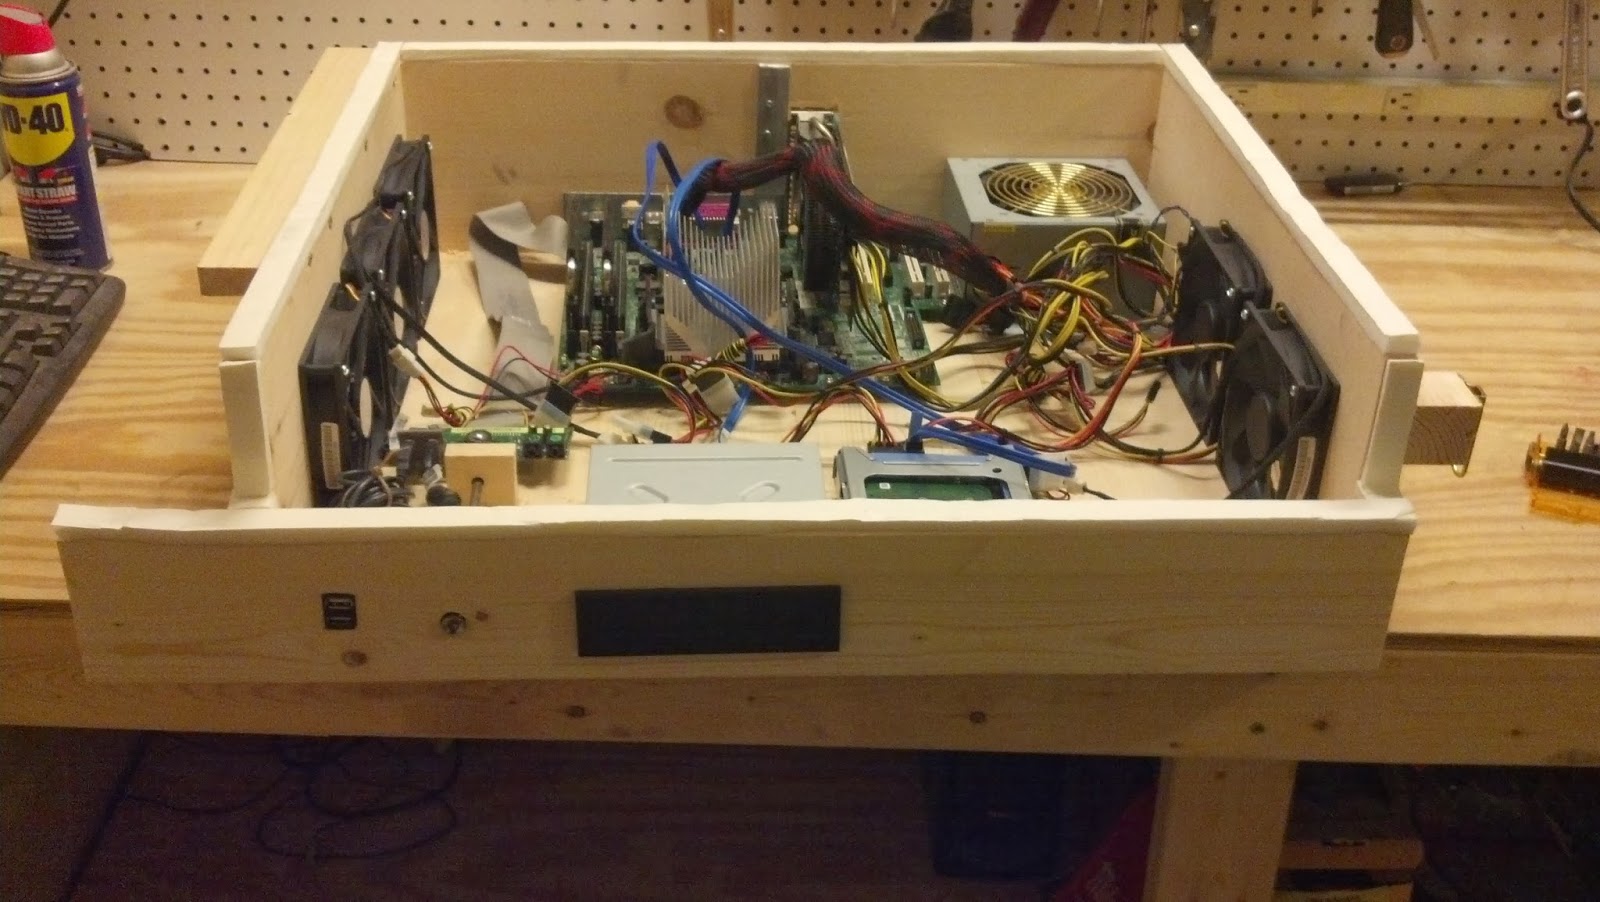
Overview with out wires attached.

Cutouts in the back for power supply, video card and peripherals.
I had to over cut the hole for the video card so that I could remove it later without removing the entire mother board.

3-120mm Intake Fans
I used 4 1/8" diameter hole saws to cut the holes for all the fans. To minimize chipping, I placed a layer of sacrificial 1/4" plywood on each side.

I didn't use screws for the box. All the corners are lock rabbet joints. I created the joints using a table saw with a standard blade. I realize I could have used screws just as easy, but I wanted this to be practice for the future.

2 - 120mm Exhaust Fans
Notice the trunk latches. These were used to attach the case under the work bench on this side.
I attached a piece of pine to the left side of the box. This will support the box on the left side.

Front Panel
2 USB ports, custom power button, DVD drive. The USB ports are just cables that are extended from the Dell front panel. For the DVD drive I cut a hole with a jig saw that was just big enough for it. I then slid the DVD drive as far as it would go. There was about 1/8" of flashing around it. Looked pretty good.

Notice where the power button is. I had to create a custom power button because the front panel ribbon was too short. For this I drilled a 1/4" diameter hole for a 1/4" rod. Then cut the power button off from the case and attached it to the rod with superglue. Then counter sunk the hole to fit the power button. The rod extends to the power switch on the Dell front panel assembly. In this picture you can see the hard drive next to the DVD drive. For the hard drive, I cut out the mounting bracket from the existing computer case.

Here you can better see the piece of pine I attached to support the left side of the computer case.

Under The Work Bench
I attached a ledge to support the piece of pine attached to the computer case.

Trunk Latch Attachment.
I had to line up the block and drill two holes through the top of the bench. Then, I started threading the screws from the top of the workbench through the predrilled holes until they breached the bottom. Then, lined up the block and continued screwing. This block is actually 1/2" shorter then the next block. That way when you rotate the case to remove it, it doesn't bind.

Trunk Latch Attachment

Fully Assembled
I put weather stripping around the top to ensure an air tight fit.

Installed
Under my work bench.

Overview Of The Completed Work Bench.
You can see that I now have plenty of space from my tools underneath.
Other Notes:
I use a wireless keyboard and mouse. So I can use the full bench top if needed.
Everything is removable/upgradeable.
It sounds like the work bench is taking off because of all the fans.
Future Enhancements:
Removable filter for the fans.
Second monitor.
Things Learned:
- Dell computers are very proprietary in how the attach components as well as the components they use. This made it difficult when it came to the front panel attachment and the mounting of the cpu heat sink.
- Making joints is somewhat difficult with a table saw and a standard blade. I've recently gotten a router and will be making a router table soon.
- Always dry fit things before gluing. I had to remake the case twice.
- Take your time when using a jig saw. It will chip less.
- Never underestimate how long something will take.
- Practice, practice, practice. I think of every bit of saw dust as experience points gained (Credit to Chuck for the analogy).
- 5 fans probably are not necessary.
Looks good.
ReplyDeleteI've been using these as computer filters for years. Works great, one size fits all, cheap.
http://www.homedepot.ca/product/cut-to-size-register-filter/959823
Christopher, Great minds think alike! I just picked those up. Working on how i want to attach them now. Thanks for the feedback!
ReplyDelete